[Updated some parts in June 01,2023]
Today I successfully installed Airflow on Ubuntu virtual machine on Linode. Main guides that I followed are this one (Archived one) and this one. The first one is a little bit out of date but clearly explained how to configure postgresql for Airflow backend. The second tutorial is good but it used default SQLite for Airflow. If you used SQLite for Airflow backend, it’ll allow only one task at one time, not parallel tasks. That’s why I preferred to use Postgresql.
Create new user for Airflow
I created a new sudo user account on my Ubuntu to use Airflow & other stuff. I think it’s better for security. After creating new account and then to switch between users, you can use below command.
su - usernameInstall Python & Required Libraries
Add details
sudo apt install python3-pip libpq-devsudo apt install libssl-dev libkrb5-devwhat’s libssl & libkrb – they are safe to install.
Install Airflow
Updated (June 1): According to official installation doc , I decided to install from PyPI. (But I don’t have any idea this new attempt will cause error in following steps. Anyway, let’s try.
Here’s one-liner code to install Airflow + extra packages.
AIRFLOW_VERSION=2.6.1
PYTHON_VERSION="$(python --version | cut -d " " -f 2 | cut -d "." -f 1-2)"
CONSTRAINT_URL="https://raw.githubusercontent.com/apache/airflow/constraints-${AIRFLOW_VERSION}/constraints-${PYTHON_VERSION}.txt"
pip install "apache-airflow[async,postgres,google]==${AIRFLOW_VERSION}" --constraint "${CONSTRAINT_URL}"
When I checked async package , Airflow use sync as default, but we can change to async. But I still need to figure out what’s the benefits of changing into async method.
AIRFLOW_GPL_UNIDECODE no longer required in version 2.6 (doc).
Check Airflow Version + Info
Run below commands to check airflow is successfully installed. you need to reboot your system if not working.
airflow version
airflow info
Configure Postgresql
For Postgresql configuration part, I followed all instructions from this blog section.
Updated (June 1):
Check Postgresql version to make sure installed or not.
psql --versionTo install postgresql
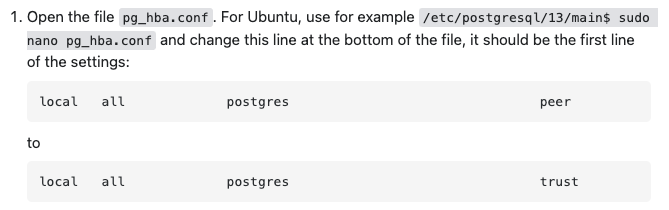
sudo apt install postgresql- Try to login default postgres user. But if it failed , try to change postgresql pg_hba.conf file (Ref)
- I only changed the first step.
Setup Airflow database and user in Postgresql
Commands to create db + user. Make sure you don’t use ‘@’ symbol in password. Airflow official doc if you want to follow alternatively.
$ sudo -u postgres psql -c "create database airflow"
$ sudo -u postgres psql -c "create user airflow with encrypted password 'mypass'";
$ sudo -u postgres psql -c "grant all privileges on database airflow to airflow";
To connect w/ db , install psycopg2
pip install psycopg2-binary
Then, change airflow config with this format –
nano ~/airflow/airflow.cfgChange sql_alchemy_conn variable from sqlite to postgresql. Airflow use SQLite as default but if you continue to use this , you can only run one tasks at one time. That’s why we changed into Postgresql which can serve to run multiple tasks.
sql_alchemy_conn = postgresql+psycopg2://<user>:<password>@<host>/<db>Change executor from default Sequential Executor to LocalExecutor in airflow.cfg file.
Then , init Airflow db
airflow db initAdd export command in /.bashrc
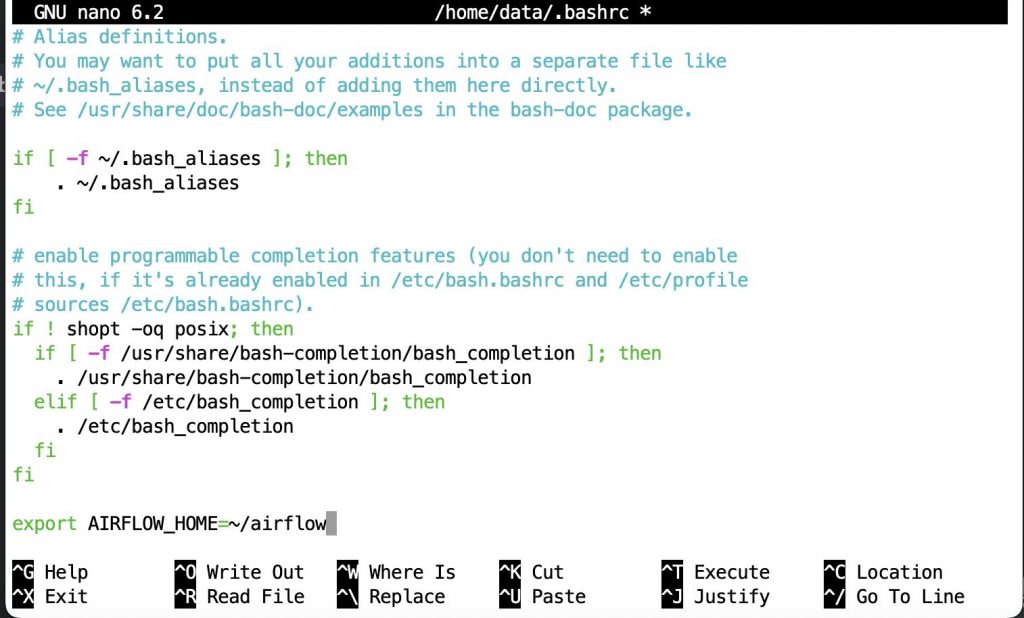
Be careful don’t add any space between ‘=’ and words. If you want to refresh , you can use below command in terminal –
source ~/.bashrcEdit Airflow Config file
The location of config file is ~/airflow/
In this .cfg file , you need to check dags location , then you should change load_examples to False if you don’t want to see several examples in your Airflow interface. But if you want to see and learn, you can leave as True.
load_examples = FalseAirflow Create user for Login Interface
airflow users create — role Admin — username admin — email admin — firstname admin — lastname adminTo check created user list –
airflow users listRUN Airflow Webserver & Scheduler
In two terminal , run one on each.
airflow webserver -p 8080airflow schedulerI need to add these two commands to create service with systemmd to automatically start when my linux machine is started.
Editing airflow-webserver.service file
While editing services I used below commands. I used nano editor instead of vim.
sudo nano /etc/systemd/system/airflow-webserver.servicesudo nano /etc/systemd/system/airflow-scheduler.service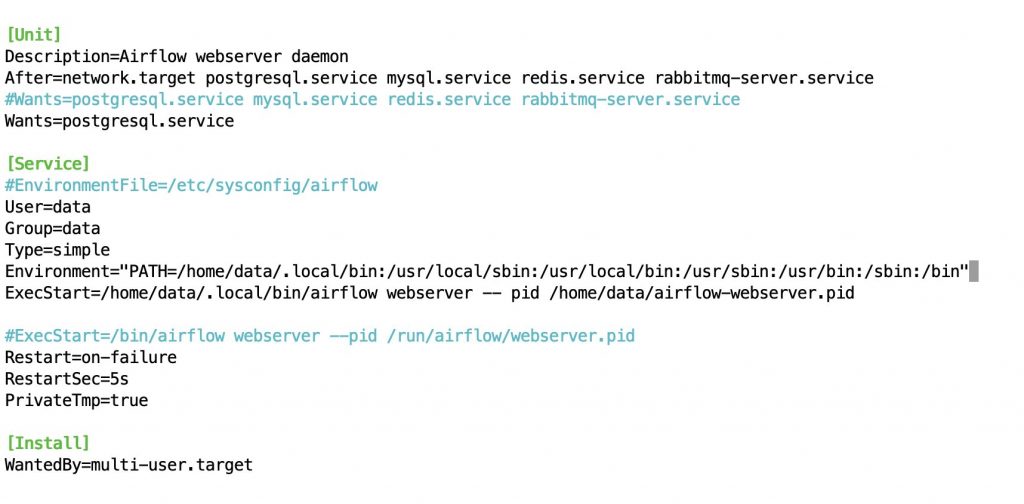
Careful things : User= … and Group= …. must be sudo username of your system. Then when adding Environment & ExecStart variables , make sure you used your username in directory. And another mistake can be made is “-- pid” with double ‘-‘ , not single “- pid or _ pid”.
Everytime you edit each of these service files , make sure you did daemon-reload.
sudo systemctl daemon-reload[Updated : June 08]
If you don’t need to restart your machine every day(e.g: hosting on a cloud server that’ll be running 24/7), you can run Airflow Webserver + Airflow scheduler as background tasks and leave them.
You already have current airflow task , you’ve to kill it at first.
run ‘airflow webserver’ and it’ll show existing port error. Kill that port number by running this commend.
kill <port_number>If you don’t current running Airflow , you can run below commands one by one.
airflow webserver -D
airflow scheduler -D
Airflow Variables
reference 1 , Youtube video , reference 2
You must be logged in to post a comment.